Christmas is just around the corner, and nothing spreads holiday cheer quite like a beautifully illuminated home. As joyful as the season is, hanging those sparkling lights can be a daunting task. But worry not! We’ve got you covered with ten essential tips to help you create a stunning Christmas light display in Northeast Florida. Whether you’re a light-hanging novice or a seasoned pro, these tips will help make your installation smooth, safe, and festive.

1. Preparing Your Home for the Festive Glow
Before you dive into stringing lights, take a good look at your home from an outsider’s perspective. What areas do you want to highlight? Which architectural features can be enhanced with lighting? A little planning goes a long way.
Consider the aspects of your home that naturally catch the eye. Are there grand columns that could be wrapped in shimmering strings, or perhaps windows that can be framed in glowing light? Deliberate on the focal points you wish to emphasize to create a cohesive and visually appealing display. Plus, understanding your home’s unique features allows you to strategically design a plan that complements its architecture. Begin by jotting down these insights, perhaps coupled with a few photos, as a reference when it’s time to start decorating.
Also, clean and clear any debris from eaves, gutters, and other installments to ensure lights can be attached securely. A tidy setup not only aids in a smooth installation but also provides a crisp canvas for your lights to truly shine against.
2. Choosing the Right Lights for Your Display
From LED to incandescent, the type of lights you choose can set the tone for your holiday decor. Understand the differences and choose lights that suit your style and budget while considering energy efficiency and brightness.
LED lights are highly energy-efficient, consuming up to 80% less energy than incandescent bulbs. This makes them an excellent choice if you’re looking to cut down on energy costs while still achieving a brilliant display. Plus, they tend to last longer and come in a variety of colors and shapes, offering endless possibilities for creativity.
Incandescent lights, while less energy-efficient, offer a classic warm glow that’s synonymous with traditional holiday charm. If you prefer this timeless look, you might decide to mix them with LED lights in less prominent areas to balance energy consumption. Remember to check lights for any damage from previous years to ensure safety and operational efficiency.
3. Creating a Design Plan
Sketch out your lighting design on paper or use a digital tool. This step will help you visualize your ideas and determine how many strings of lights you need, saving you from unnecessary runs to the store.
Think about incorporating a variety of light forms, such as icicle lights draping along your roof’s edge or net lights that effortlessly cover shrubs. Mapping out the diversity of your lighting types on a plan will help manage both the aesthetic appeal and the symmetry of your display.
To bring your vision to life, leverage technology like mobile apps designed for home and garden design. These tools can help simulate how different lighting configurations will appear, providing you with a realistic preview before you climb any ladders. This forethought minimizes the need for re-dos and helps you achieve a gratifying result on your first attempt.
4. Securing Necessary Equipment and Tools
Gather your ladders, extension cords, and clips before starting. Having everything on hand will streamline the process and help you avoid looking for tools in the middle of your project.
Make sure to use durable outdoor-rated extension cords, especially if your display covers large areas, to accommodate the power needs safely. Mark circuits and outlets with labels as a quick reference to avoid overloading circuits. You’ll thank yourself later as testing and maintaining your display becomes smoother and more efficient.
5. Emphasizing Safety First
Ensure your safety by checking all lights for damage and using outdoor-rated products. Avoid overloading electrical outlets and be mindful of ladder safety when placing lights.
Organize the flow of power carefully to prevent tripping the circuit breaker. Each outdoor connection should be well covered to shield it from rain and moisture. Consider utilizing a weatherproof outdoor power strip to hod multiple connections.
6. Starting with the Roofline for Impact
Accent your home’s outlines by starting with the roofline. This creates a striking first impression, and working from top to bottom ensures consistency and balance in your display.
Once the border is established, you can easily gauge where more embellishment is needed below. Use clips designed to fasten lights to edges securely, reducing the risk of detached or hanging bulbs.
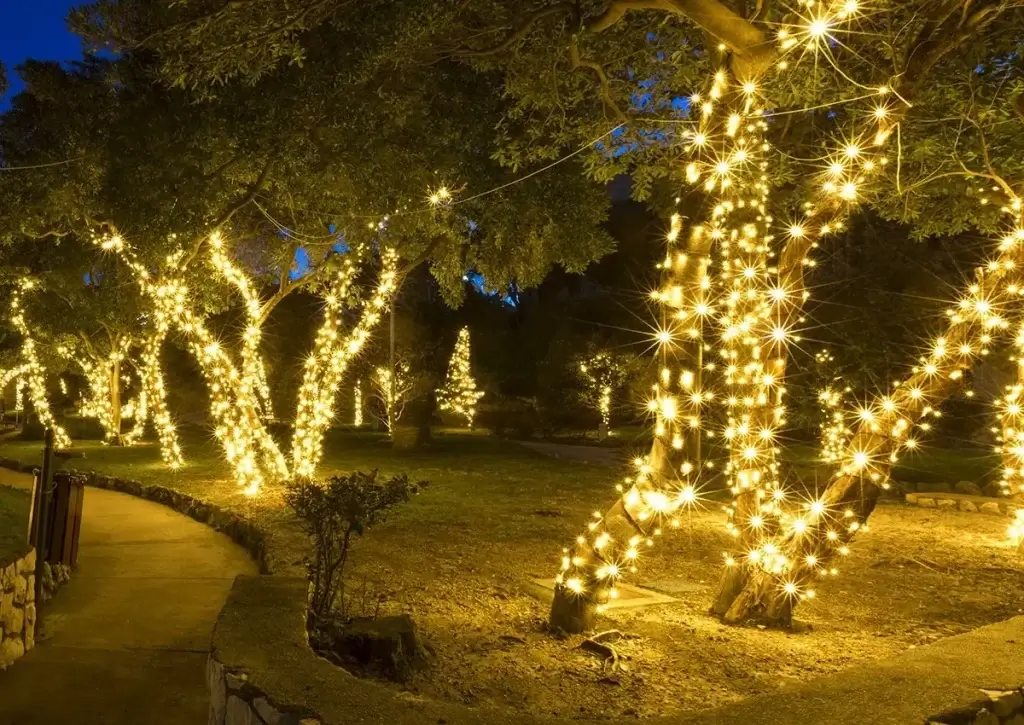
7. Highlighting Trees and Shrubs
Wrap branches and trunks with twinkling lights to create a magical garden. Use varying colors and light patterns to add depth and interest to your outdoor space.
For a lush visual impact, consider organizing the lights in layers. String deeper colors inside the canopy to create an illusion of depth, and brighter hues on the outside to make each tree and shrub pop with festive brilliance.
8. Brightening Up Pathways
Illuminate walkways with string lights or lanterns for a welcoming entrance. This not only looks festive but also improves safety for guests arriving after dark.
You might consider using solar-powered pathway lights for an eco-friendly option. These typically engage automatically as the sun sets, offering convenience alongside their holiday charm.
9. Incorporating Unique Elements
Add personalized touches like themed figures or light nets. Look for creative ways to incorporate items that reflect your family’s personality and traditions.
Think about including personalized neon signs or a festive projector display to cast enchanting, moving scenes across your home’s facade, making your decorations the envy of all passersby.
10. Mastering the Cleanup
Once the holidays are over, take down lights with care to avoid damage. Store them in an organized manner for easy installation next year.
Before putting them away, wipe off any dirt or moisture, which can save you a hassle before the next season. Invest in plastic bins or spools that prevent tangling, simplifying the next installation process and elongating the life of your beloved holiday lights.